Mobile Access
Access your terminal from your phone or tablet. This tutorial covers starting a public tunnel, scanning the QR code, and installing relay-tty as a PWA for a native app experience.
What you'll need
- relay-tty installed on your computer
- A phone or tablet with a browser
Step 1: Start the server with a tunnel
relay server start --tunnelThis opens an outbound connection to relaytty.com, which reverse-proxies traffic back to your machine. No DNS, no port forwarding, no accounts.
You'll see:
relay-tty listening on http://localhost:7680
Tunnel active: https://abc123.relaytty.com
[QR code]
The subdomain is stable — it's saved in ~/.config/relay-tty/tunnel.json and reused on subsequent runs.
Step 2: Scan the QR code
Open your phone's camera and scan the QR code. It opens your relay-tty instance directly in the browser.
Authentication
If you've set JWT_SECRET, you'll need to authenticate. The server prints an auth token URL on startup — visit it once to set a cookie (30-day expiry).
Step 3: Create a session
From the web UI on your phone, tap the + button to create a new session. Choose a shell (bash, zsh) or a specific command.
Or create one from your computer first:
relay bashIt will appear in the web UI automatically.
Step 4: The terminal view
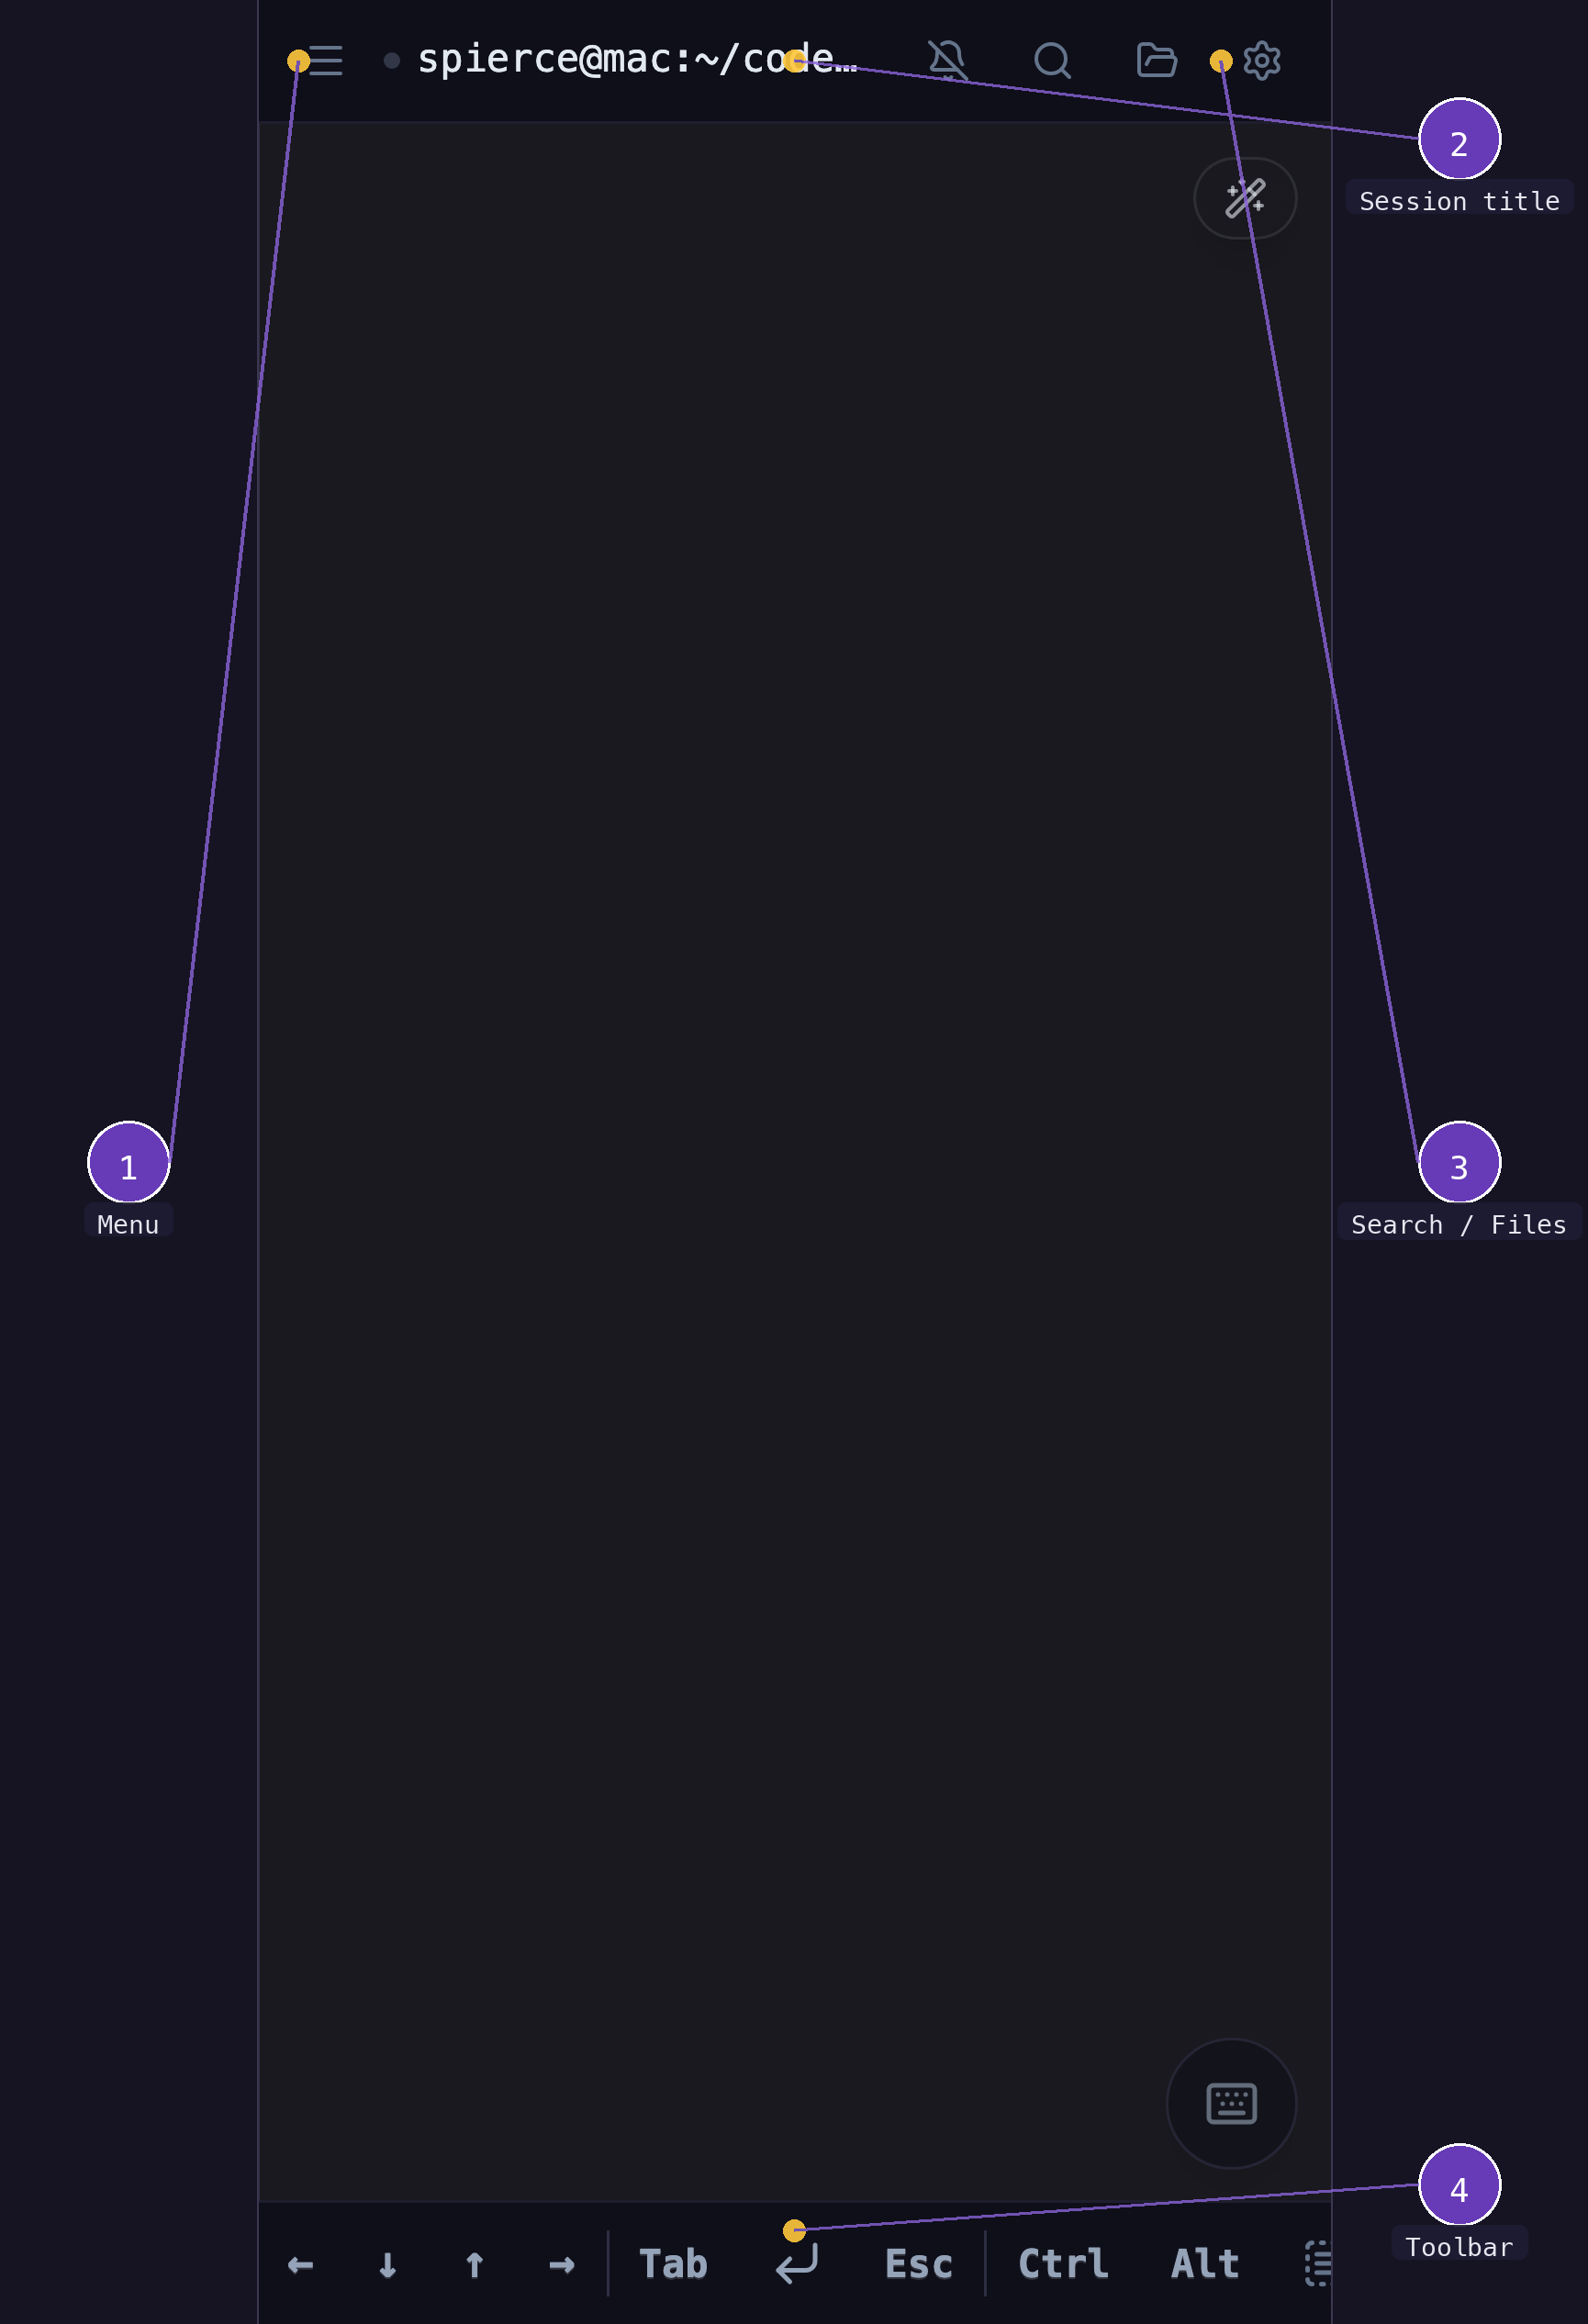
- Menu — opens the sidebar drawer with session list and navigation
- Session picker — tap the title to switch between active sessions
- Terminal — full interactive terminal with pixel-smooth touch scrolling
- Toolbar — arrow keys, Tab, Esc, Ctrl, Alt modifiers
Step 5: The mobile toolbar
The toolbar at the bottom gives you everything a physical keyboard provides.
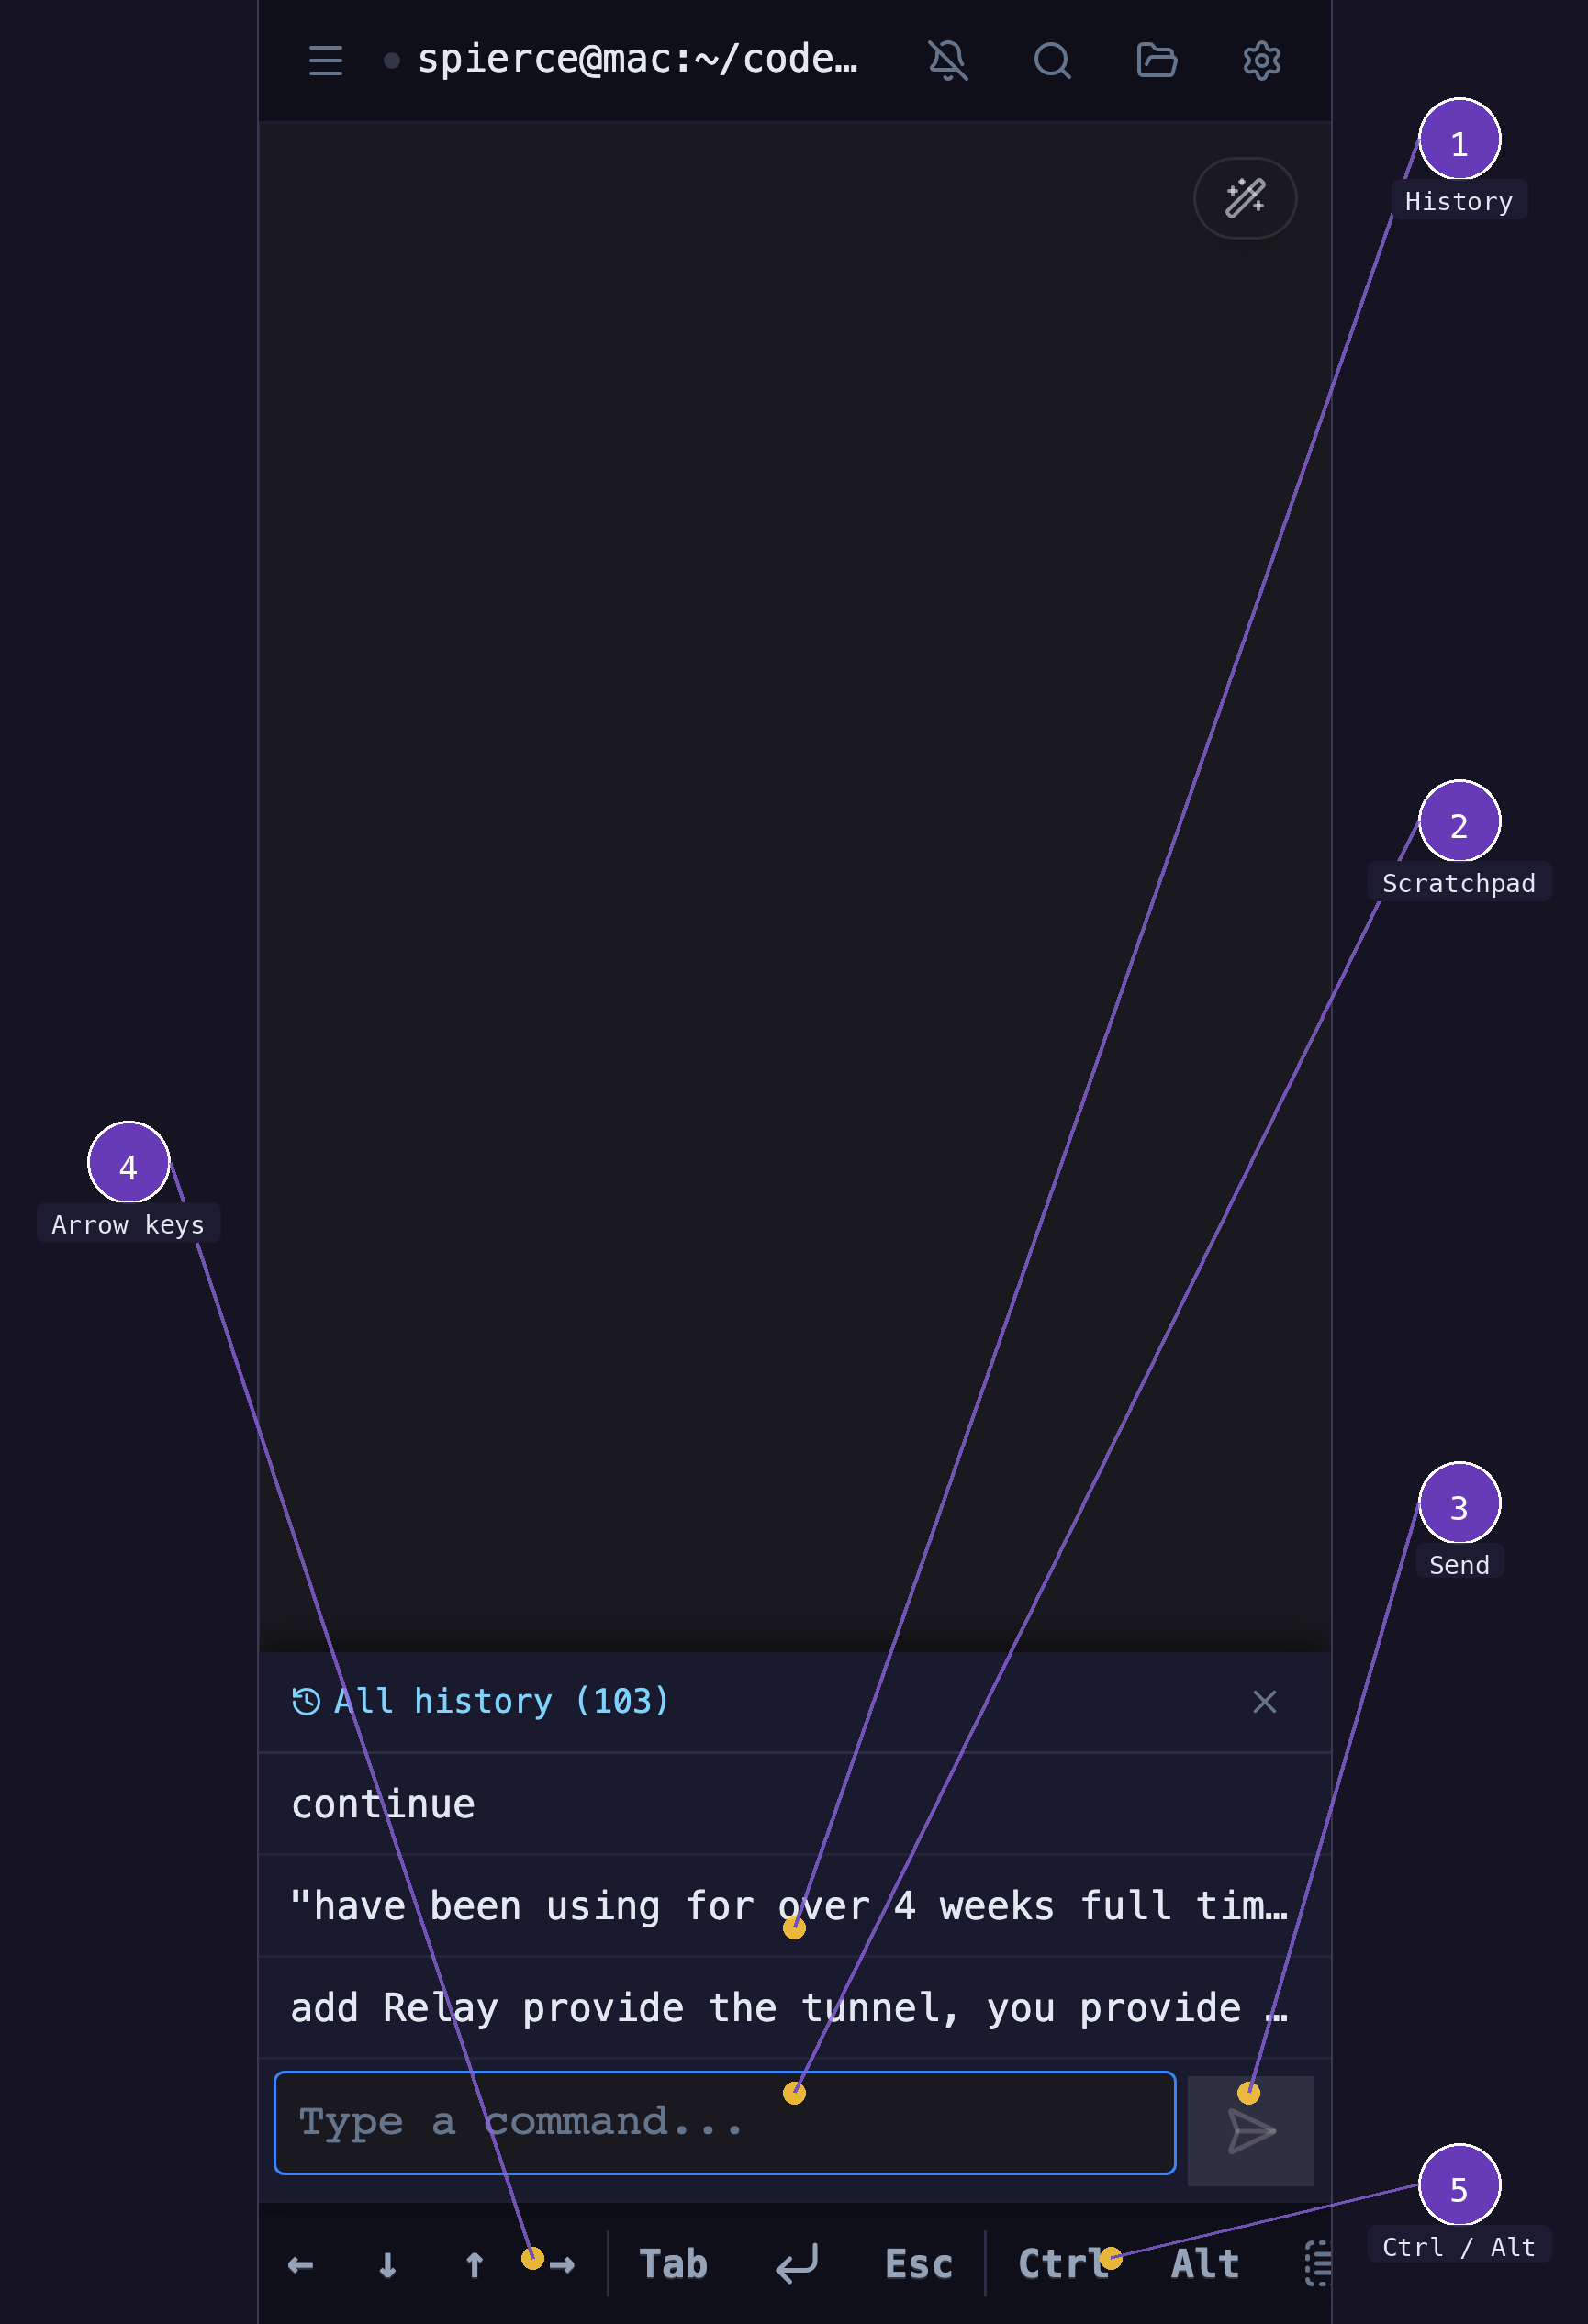
- Scratchpad — compose commands with autocomplete and autocorrect, then send to the terminal
- Send — sends scratchpad text to the terminal
- Arrow keys — navigate shell history and move the cursor
- Ctrl / Alt — modifier keys for terminal shortcuts (Ctrl+C, Ctrl+Z, etc.)
Scratchpad for complex input
Mobile keyboards and terminal input don't always mix well. The scratchpad lets you compose commands with autocomplete and autocorrect, then send the finished text.
Pinch-to-zoom
Pinch to adjust the terminal font size. The font size is saved per session — it carries over between views and persists across reconnects.
Step 6: The sidebar
Tap the menu button to open the sidebar drawer — your session manager.
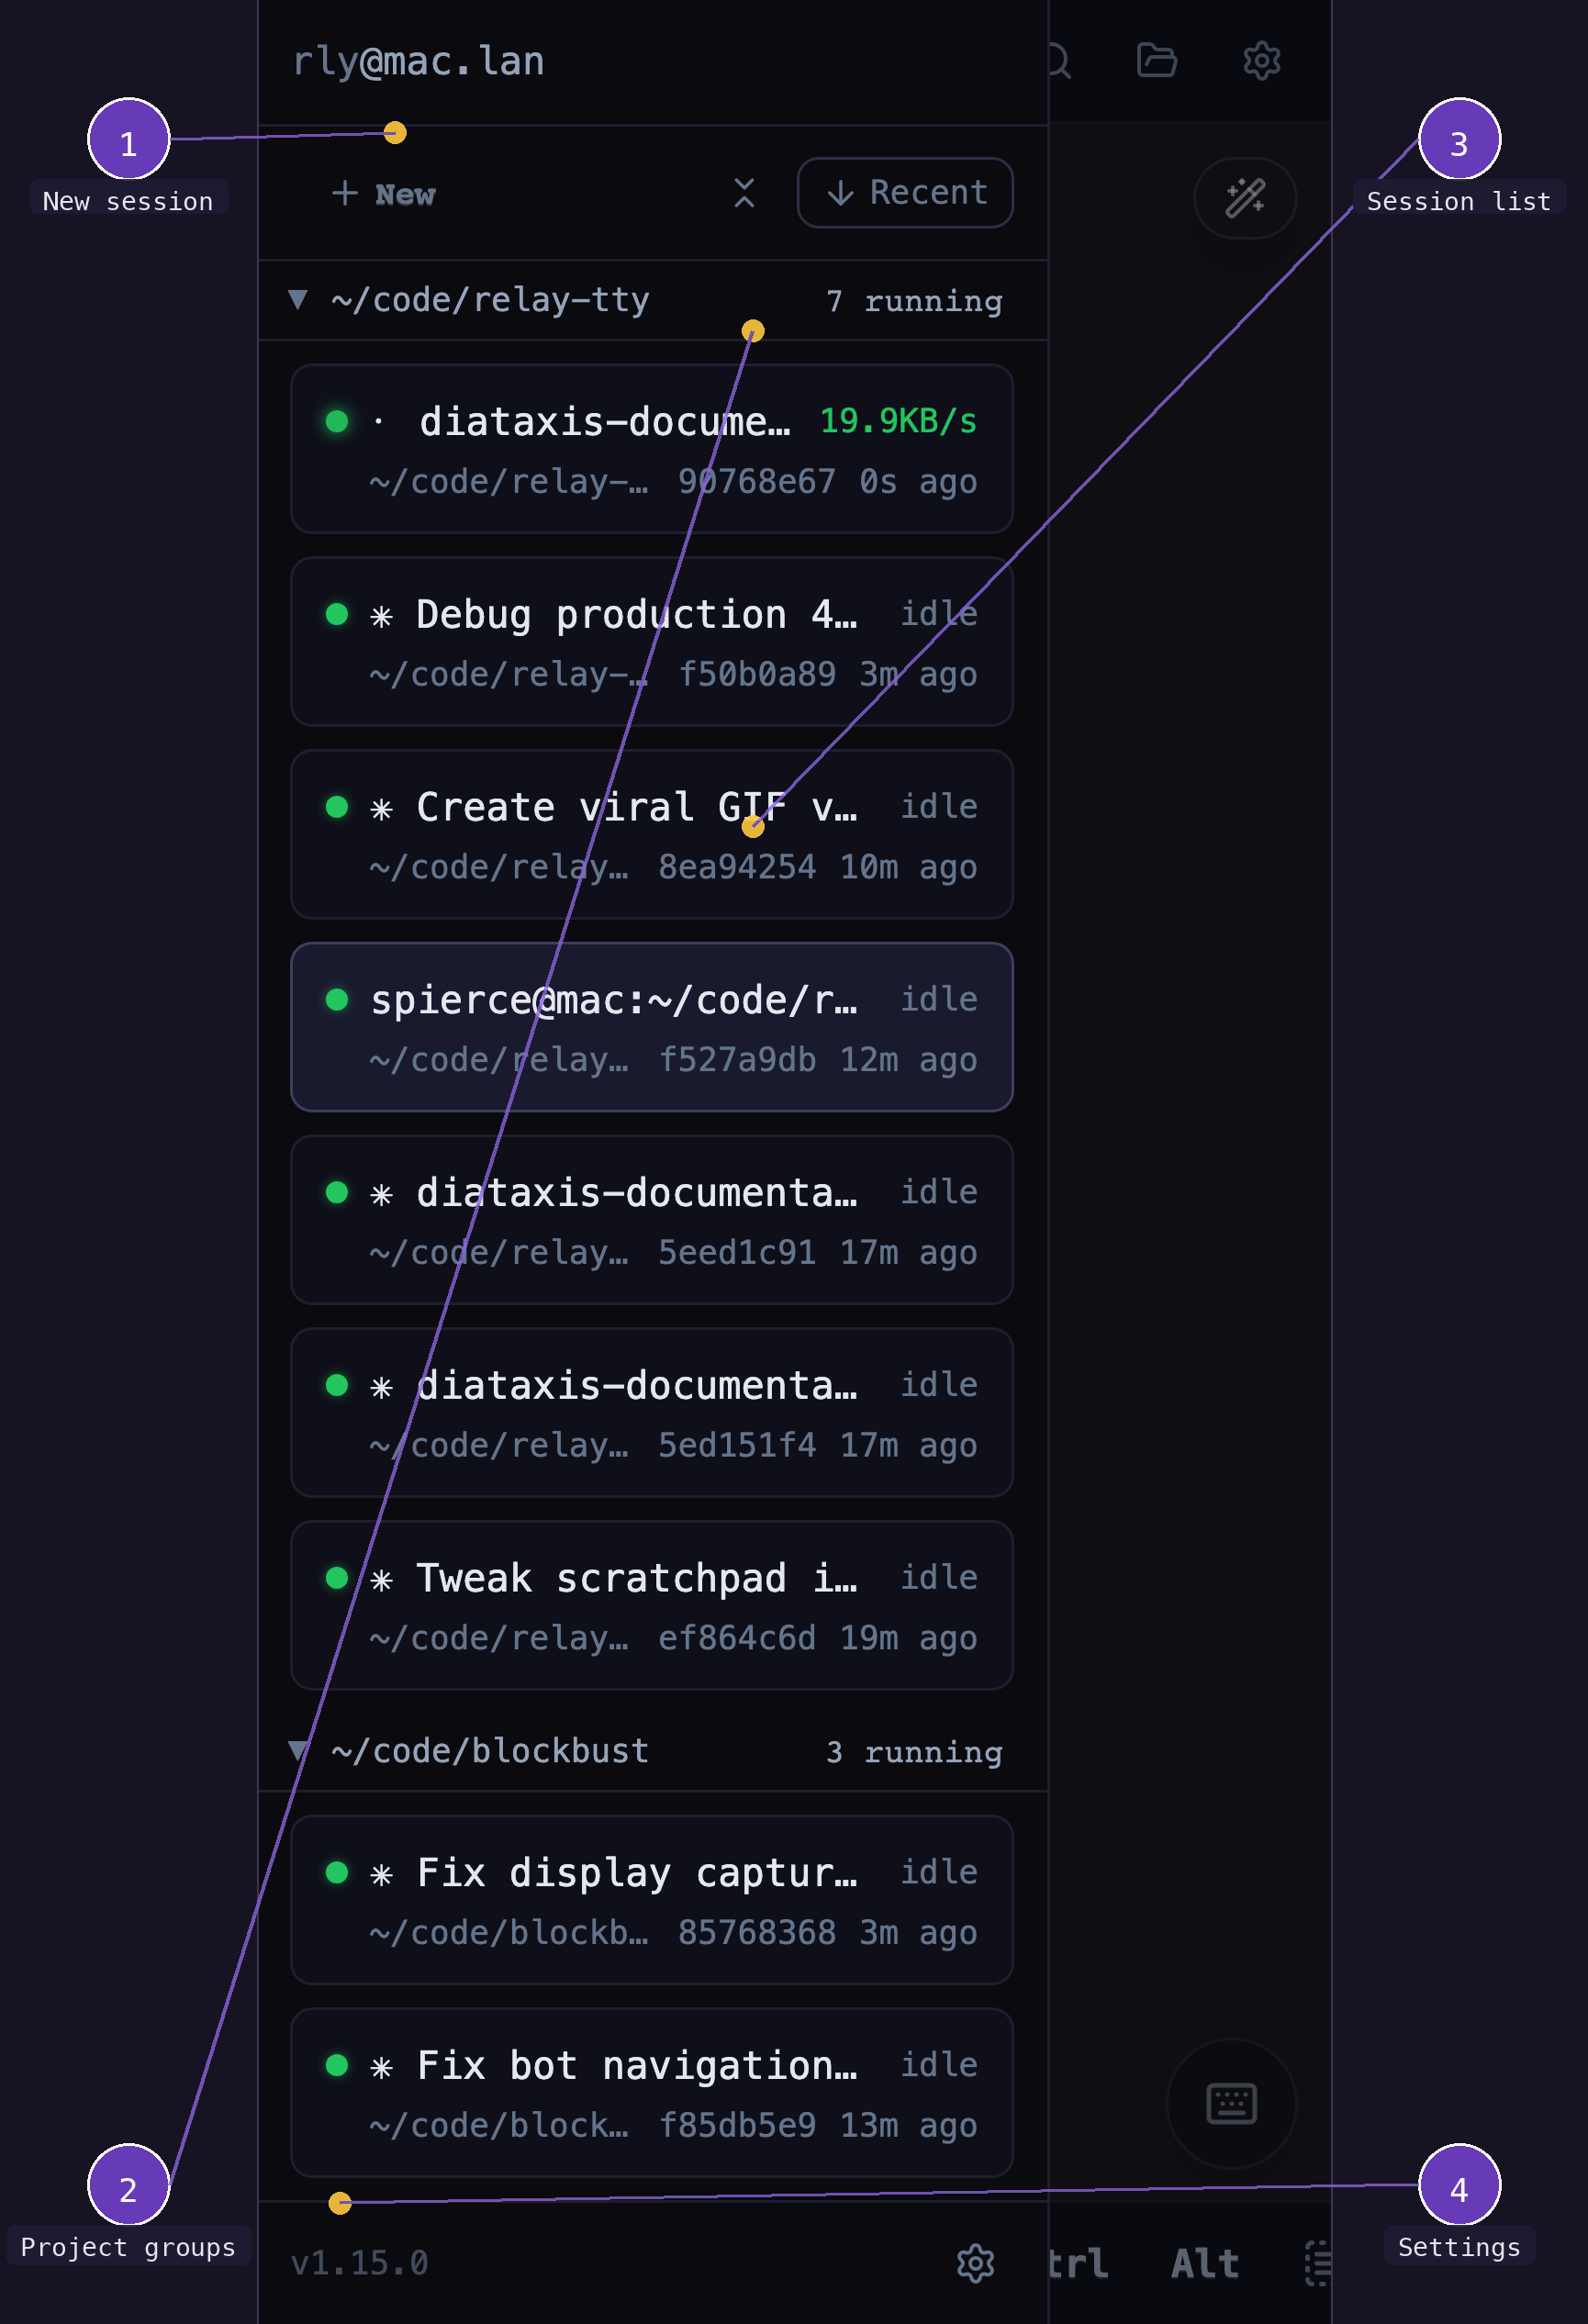
- New session — create a new session with a shell or AI assistant
- Session list — all running sessions, grouped by working directory, with status and throughput
- Settings — configure custom commands, project roots, and Ctrl shortcuts
Step 7: Install as a PWA
For a native app experience without browser chrome:
- Tap the Share button (box with arrow)
- Tap Add to Home Screen
- Tap Add
- Tap the three-dot menu
- Tap Add to Home Screen or Install app
- Tap Install
The PWA runs in standalone mode — no address bar, no tabs. It looks and feels like a native terminal app.
Step 8: Discord notifications (optional)
Get a clickable auth link posted to Discord on server startup:
export APP_URL='https://abc123.relaytty.com'
export DISCORD_WEBHOOK='https://discord.com/api/webhooks/...'
relay server start --tunnel
Tap the link on your phone to authenticate instantly.
What just happened?
The --tunnel flag opened a multiplexed WebSocket connection to relaytty.com. All HTTP requests and WebSocket connections to your subdomain are proxied through that single outbound connection back to your local server. Your machine is never directly exposed.
Next steps
- Share a session — let someone else watch your terminal
- Web UI views — grid gallery and lanes view
- Install as a system service — auto-start on boot